I prefer not to shoot with flash when I can help it – I don’t like the way it washes colors out. Unfortunately, sometimes if you don’t leave the exposure open long enough, or don’t have time to adjust your exposure in the first place (candid shots are my favorite but can be a bitch if you only have a second to capture the moment), you end up with under-exposed photos that may be too dark to use. Dark photos are particularly challenging to retouch, because as you make the image lighter, it can end up looking very grainy. This tutorial will show you a few ways to salvage a dark photo and minimize some of the graininess.
Retouching dark photos is possible because the camera captures more information than your eyes can see, so even if something looks very dark, there is more information contained there that can be brought out using a series of filters and adjustments. Bear in mind that the end result will be much nicer if the photo can be resized to a smaller version. The tricks we’ll use here can get rid of some of the graininess, but it does so by reducing noise and effectively blurring the image slightly, so if your end result image is smaller than the original, you’ll end up with a nicer finished product. Depending on how dark the image is that you’re starting with, the end result may not be perfect, but it may work for your needs.
For this tutorial, we’ll use a photo taken at a recent concert. MC Frontalot, MC Lars, YTCracker and Devo Spice played at the Mexicali Blues Cafe in Teaneck, New Jersey on the evening of the United States presidential election between John McCain and Barack Obama. (OUSTANDING show, by the way – go see them if you can, and bask in their awesomeness. Seriously. More photos of the show that are far better than the photo used in this article are available here.) Being political people, the musicians were kind enough to give us election updates every 10 minutes or so. In this shot, I’m looking over MC Frontalot’s shoulder, checking out the results map on CNN. However, it wasn’t a staged shot, and flash would have ruined it, so the shot came out too dark.
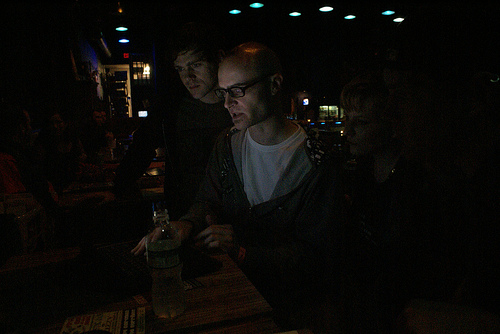
With a few tweaks, we can make this a usable photo. It was so dark to start with, its never going to be portfolio quality, but for pics that you can’t reshoot and would like to try to save, these techniques may help.
Getting There
The first place I start is either with IMAGE > ADJUSTMENTS > CURVES or IMAGE > ADJUSTMENT > LEVELS. In this case I started with levels. The three arrows you see on the bottom of the levels palette signify your shadow, midtones and highlights, left to right in that order. Most of the time, you’re going to want to move your midtones the most, and then finesse the levels with your shadow and highlights. This will bring up the light levels in the entire image, and then you can pull some of the shadows down again so it doesn’t look too washed out.
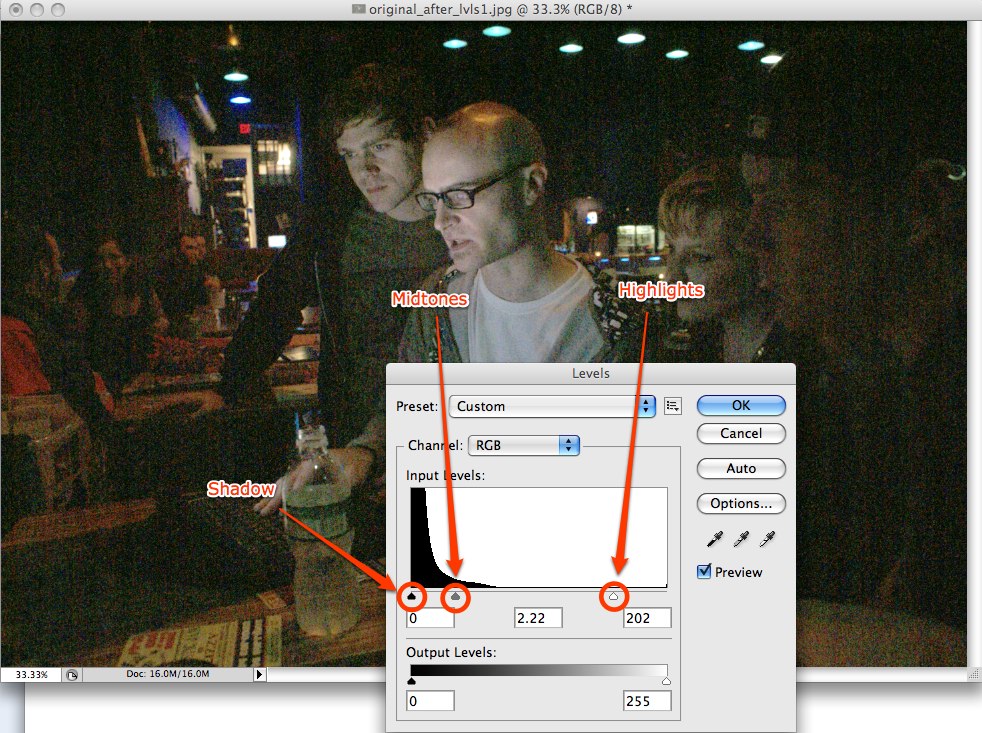
As you can see, its still a little grainy, but there’s only so much we’ll be able to do to save this one. That said, I liked the shot, so I wanted to do what I could. This is a particularly severe example, so our end result isn’t amazing, but at least you can see what’s going on. When you’re starting with a less extreme example, your results will be much better.
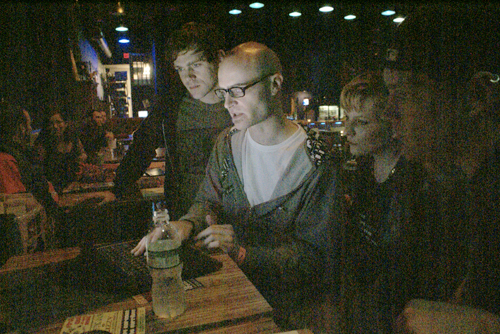
This looks pretty grainy, even at this smaller size – but the image I was working with was 2896×1936, so it was *really* grainy in the larger version. Here’s an “actual size” detail shot.

Far from awesome, but its getting there – you can actually see my face now. We’re not going to be able to get too much more lightness in this one without making it even more grainy, so I’m going to stick with this level of exposure and work on smoothing out some of the noise.
The best way to accomplish this is going to be using the noise reduction filter, which basically blurs the pixels slightly and attempts to smooth out harsh variations in pixel colors.
Using FILTERS > NOISE > REDUCE NOISE, we’re able to blur out some of the grain and reduce the colors in the noise, making it less obvious. You’ll have to play with these settings to get it the way you want it – and you may even need to run the filter again to get the level you want – but bear in mind that the more you preserve sharpness and/or detail, the less effective this is going to be. This is where working with a larger image and resizing down is nice – the blurring becomes less obvious on a resized image.
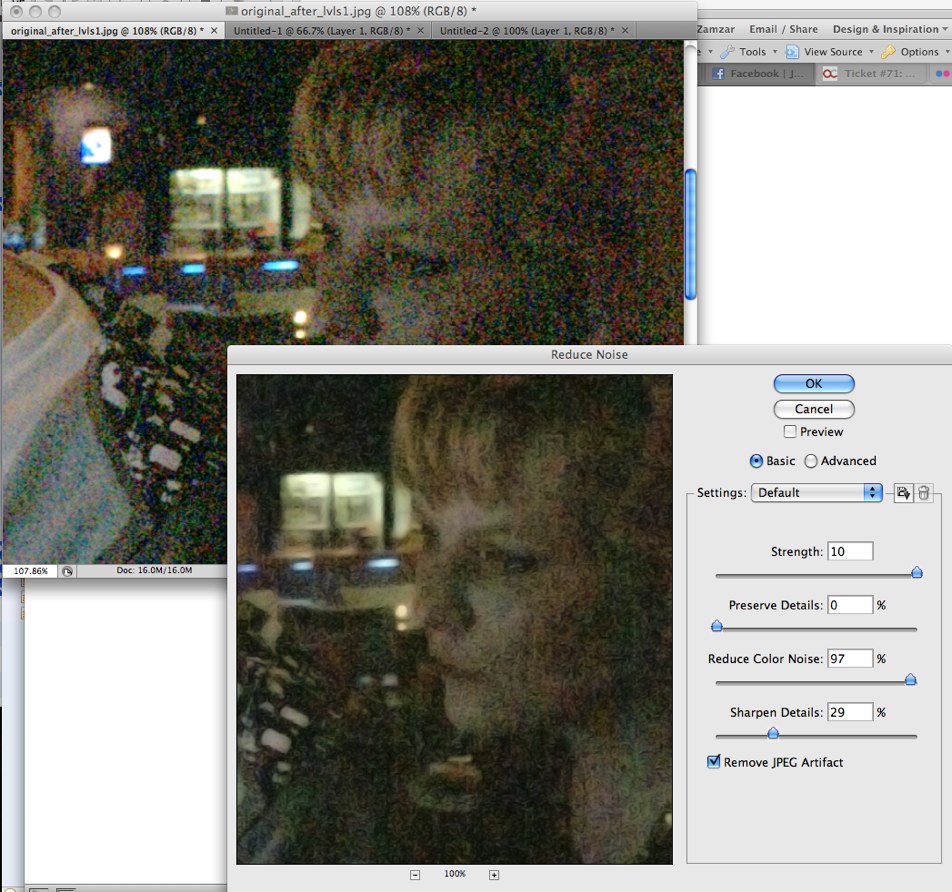
Because this is an extreme example that started off very dark, I ran the noise reduction filter again with the same settings.

I then cropped the image, getting rid of some of the extra stuff along the sides, resized it and then hit it once more with the levels to bring out a teensy bit more of the shadow, which helps reduce the grain further.
So we went from a practically unusable photo:

To an image that won’t exactly end up in my photo portfolio, but at least you can see what’s happening:

Obviously, you’ll need to play with the settings on each of the filters to get the result you want – and hopefully you won’t be starting with an image that is basically pitch black, so your final product will be a little smoother.
If you’re stuck with an image that is particularly grainy, you can also try to get a little creative by using the texture to your advantage. By making the image black and white or sepia-toned, the grainy look can actually help the image, making it appear more aged. To convert an image to black and white or sepia, go to IMAGE > ADJUSTMENTS > BLACK & WHITE.
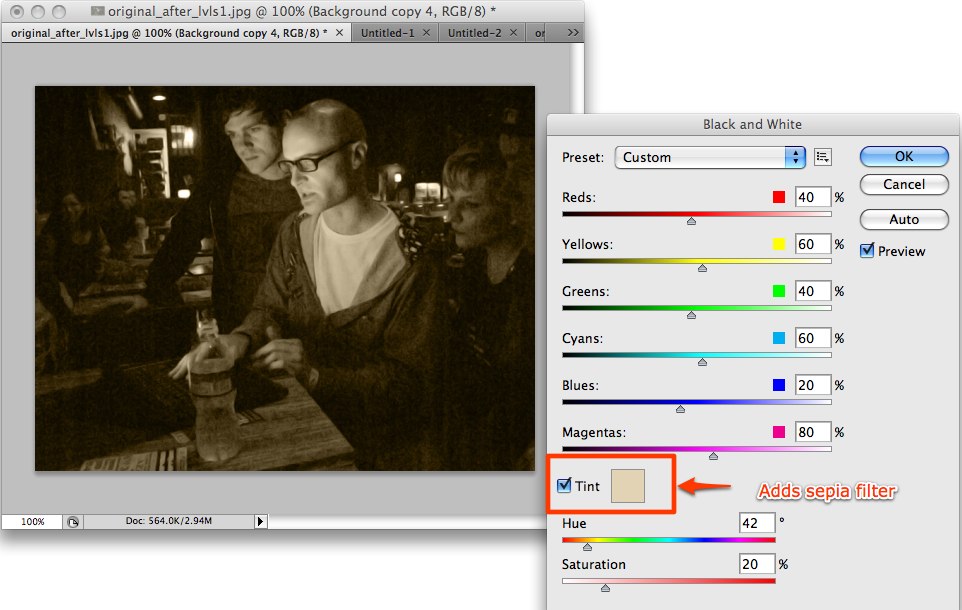
Some variations:
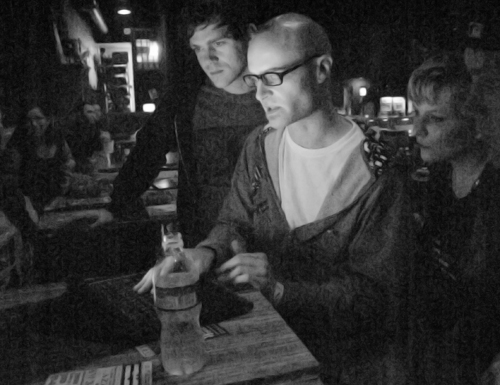
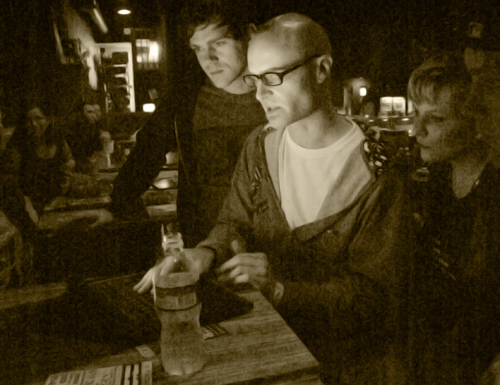
And don’t forget to play around a little. I found that I liked the end result better when I ran the Black & White filter using the tint setting twice.
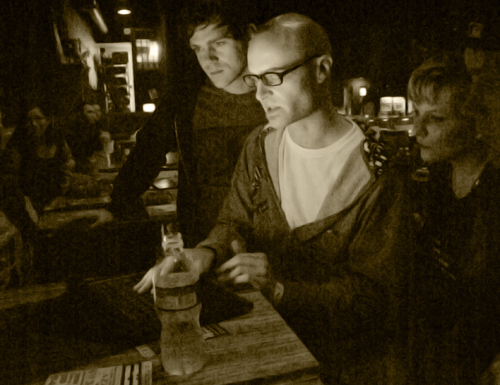
And that’s all there is to it. Have any tips of your own for saving a photo that’s just too dark? Be sure to share in the comments!